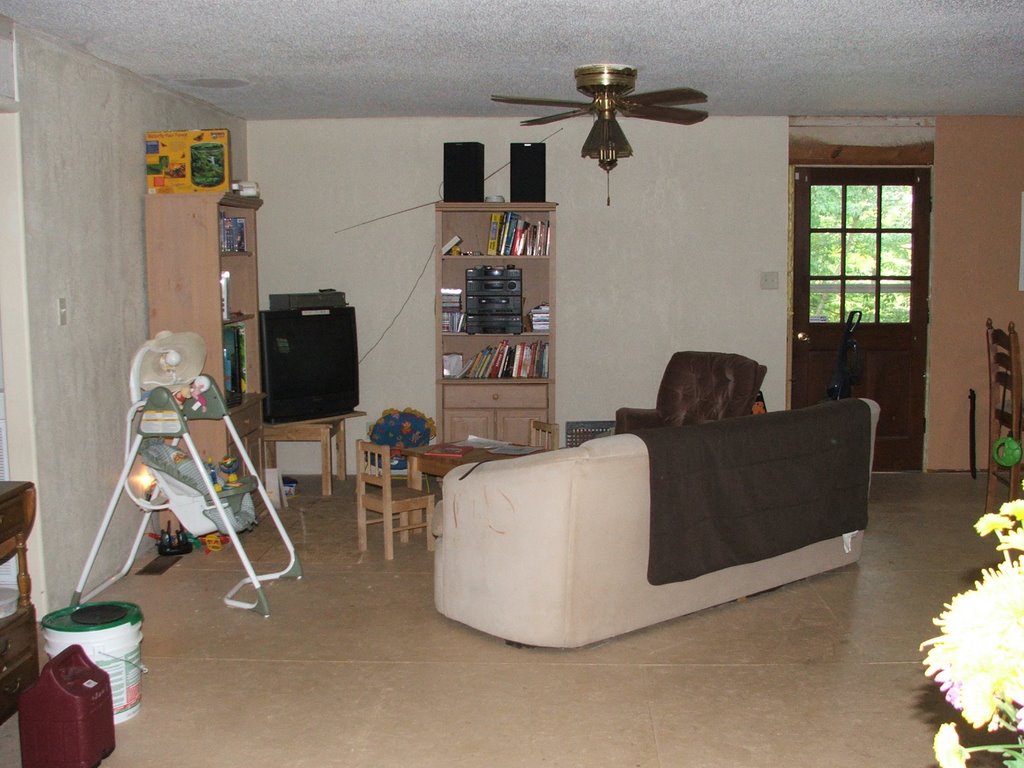
This is the room as it appeared when we first looked at it. The long, scary hallway is to the left (that door's gone now, and it's just a hallway again). The kitchen/laundry space is to the right, on the other side of the built-in bookcase. That door against the back wall leads to steps that pretend to lead down to the back yard.
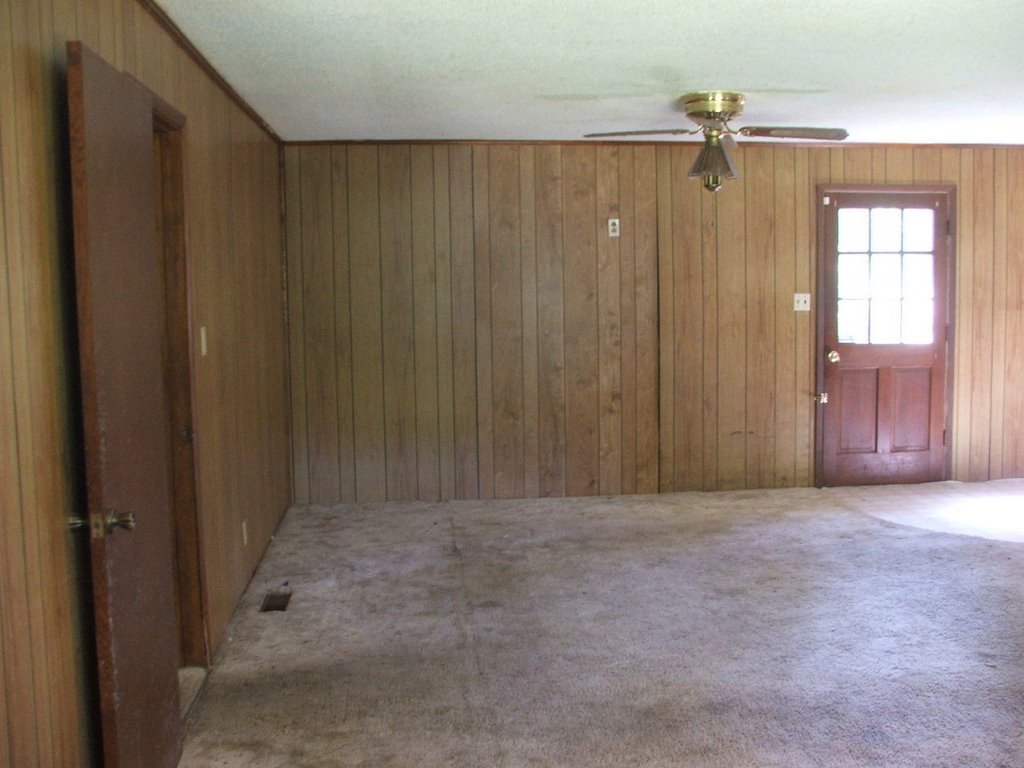
A basic shot from the entry, looking in. On the other side of that wall is the kitchen and the washer/dryer set up.

This wall came down pretty easily...
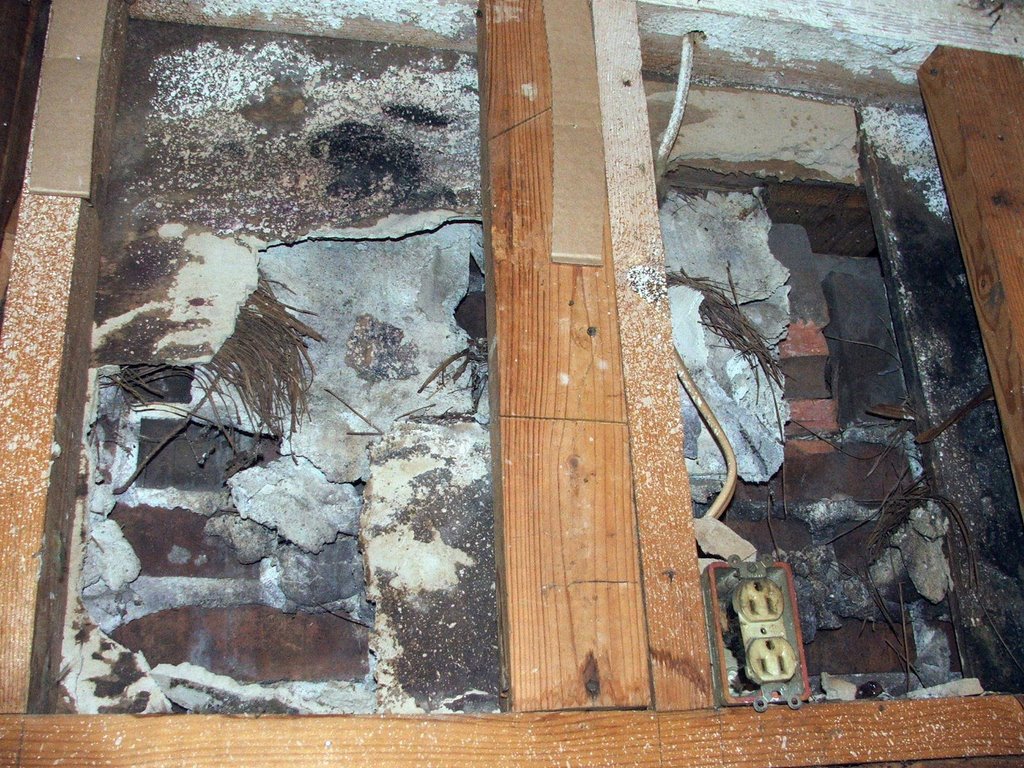
But then there was "the wall of fear", which also, incidentally, came down easily. But it wasn't such a warm and fuzzy feeling when it did. This is the back, exterior wall. The one that sits there, looking so innocent and solid in the first shot. We pulled the paneling and found this:

That is exterior brick peeking through, my friends! There's nothing there but snake sheds and a few unfortunate squirrel remains. Oh, and an old fireplace. (Remember the stove in the basement with the myriad pipes? They led to what was left of this chimney!)And just in case you need a closer look...
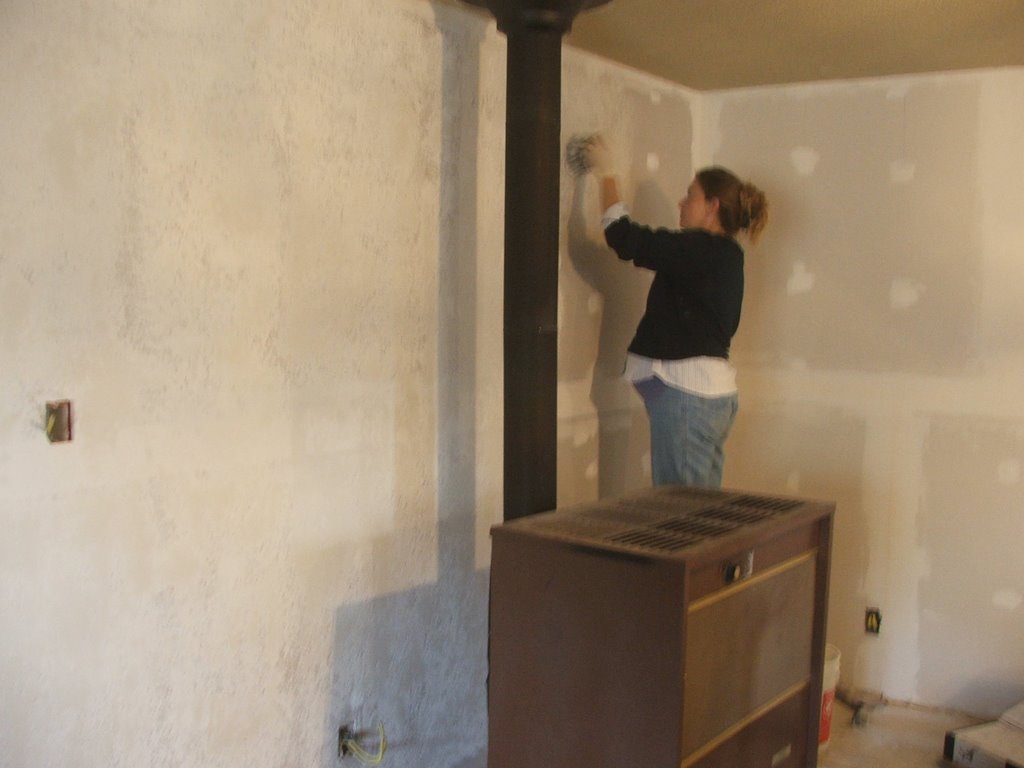
We rebuilt the wall, framing it out and jamming it into place. (See the pretty, new white wall there, on the right?) Then, since it was December and as you can see, there was no insulation, we brought up and installed the behemoth stove. The living room stayed like this for quite some time:

This is what nesting looks like when you're renovating. It's not a pretty sight, I know. But if you wanted to know how easy it is to texture walls, well, there ya go.
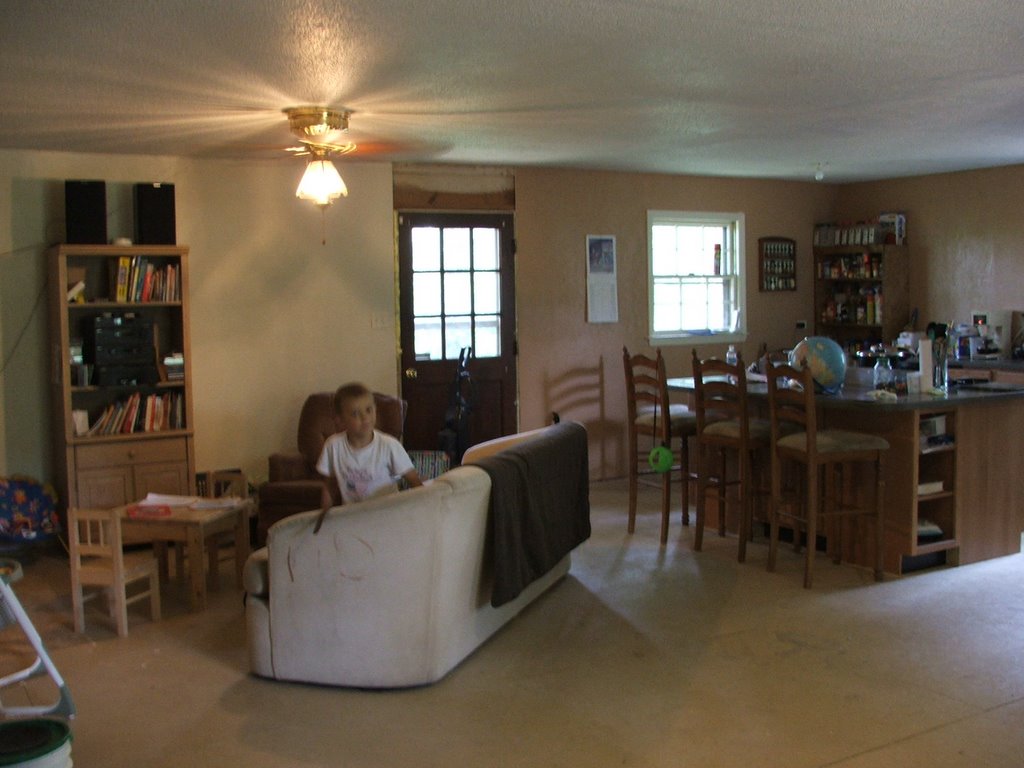
And now, the living room is about 85% finished.
The space above the back door will be trimmed with a rough hewn board, to give it a litle architectural interest, as well as delineating the change in "spaces": kitchen, living, dining. (We'll mirror that on the opposide doorway leading into the hall.) The door, painted. Eventually it'll be removed, and that opening will be widened to extend into a family room. The space is much easier to use now, and it acts as wonderful overflow seating when the kitchen fills up.
And this one, taken from the entry again. Look, Ma - No Wall! The picture's a bit fuzzy, but you can see the finished paint on the kitchen window. What a difference nice trim makes! Yes, it's frustrating, and yes, I will be complaining about it again in the near future. But when all is said and done, it is worth the effort.
Still a lot of work to do, but it's come a long way toward feeling like Home. Hopefully, I will be able to get the bedroom before and after shots posted before the end of the month. And someday, when we're old and decrepit, we may get to working on the exterior of the place!
Thanks for taking a look!
Kiss those babies!
~Dy
9 comments:
Wow! I love the open, great-room feeling. It looks so spacious and open. Very welcoming. Such a great job you two are doing!
I should actually be home tomorrow for the first time all week. Looking forward to the rest! Talk to you soon,
LB
I love seeing these pictures. I am so proud of the results, as if I had something to do with it! Great job!
Wow, the difference is like night and day! Great job on this and the dining room. Keep posting pictures, this is fun. Especially since it is not happening in my house!!LOL!!
Dy, it's amazing what you've done. Really, your house is so beautiful! I'll bet you are just loving it, and you have every right to. I love it!
Ok, I have to ask because I'm just out of my wits with trying to figure it out - what the heck is 'texturing'? What is it that you guys do to walls down south? Up here, you put up your studs, cover them with drywall sheets, & then tape the seams with special tape & putty. Then sand smooth & paint the suckers. Are you guys making plaster walls? Or what? I'm SO confused....
Oh and it looks so nice & open. I'm a big fan of open living spaces. Wow you guys have accomplished so much!
Wow! It's better than This Old House!
I'm so impressed!
mere
Yeah, reading your posts is like watching HGTV. You guys are amazing me with what you've done in your house. And pictures really are worth a thousand words here!
Love the pictures! I am trying to have "vision" with the houses we are looking at, but also keep in mind that we are not so handy as you and Zorak! I really need you guys here to help us assess these houses and figure out if they have potential or are just hopeless disasters (and then stay on to help with the renovations!).
Also, I'm with Hornblower on being curious about the texturing. We having't put anything special on our drywall before we've painted, but I know some builders do an "orange peel" texture before they paint to add interest. Is that what you are doing?
Wow!All the hardwork has really paid off! It looks absolutely AWESOME!!!!
Post a Comment